Difference between revisions of "The Falcon and the Wolf Gallery"
Sarna News


m (...work on next day) |
(filled in a few more artist blanks. first image is still unknown, leaning towards Jim Nelson, but not sure.) |
||
| (4 intermediate revisions by 2 users not shown) | |||
| Line 1: | Line 1: | ||
<gallery> | <gallery> | ||
| + | |||
| + | Image:The Falcon and the Wolf (1).jpg|Illustration by ?? | ||
| + | Image:The Falcon and the Wolf (2).jpg|Illustration by [[Brad McDevitt|Bradley K. McDevitt]] '95 | ||
| + | Image:The Falcon and the Wolf (3).jpg|Illustration by Bradley K. McDevitt '95 | ||
| + | Image:The Falcon and the Wolf (4).jpg|Illustration by Bradley K. McDevitt '95 | ||
| + | Image:The Falcon and the Wolf (5).jpg|Illustration by [[Peter Bergting]] '95 | ||
| + | Image:The Falcon and the Wolf (6).jpg|Illustration by Bradley K. McDevitt '94 | ||
| + | Image:The Falcon and the Wolf (7).jpg|Illustration by [[John Paul Lona]] '95 | ||
| + | Image:The Falcon and the Wolf (8).jpg|Illustration by John Paul Lona '95 | ||
| + | Image:The Falcon and the Wolf (9).jpg|Illustration by Peter Bergting | ||
| + | Image:The Falcon and the Wolf (10).jpg|Illustration by Peter Bergting | ||
| + | Image:The Falcon and the Wolf (11).jpg|Illustration by Peter Bergting | ||
| + | Image:The Falcon and the Wolf (12).jpg|Illustration by Peter Bergting | ||
| + | Image:The Falcon and the Wolf (13).jpg|Illustration by Bradley K. McDevitt '95 | ||
| + | Image:The Falcon and the Wolf (14).jpg|Illustration by [[Ray Lederer]] '95 | ||
| + | Image:The Falcon and the Wolf (15).jpg|Illustration by Ray Lederer | ||
| + | Image:The Falcon and the Wolf (16).jpg|Illustration by John Paul Lona '95 | ||
| + | Image:The Falcon and the Wolf (17).jpg|Illustration by Ray Lederer '95 | ||
| + | Image:The Falcon and the Wolf (18).jpg|Illustration by Ray Lederer | ||
| + | Image:The Falcon and the Wolf (19).jpg|Illustration by Ray Lederer | ||
| + | Image:The Falcon and the Wolf (20).jpg|Illustration by Ray Lederer '95 | ||
| + | Image:The Falcon and the Wolf (21).jpg|Illustration by John Paul Lona '95 | ||
| + | Image:The Falcon and the Wolf (22).jpg|Illustration by [[Earl Geier]] | ||
| + | Image:The Falcon and the Wolf (23).jpg|Illustration by Ray Lederer | ||
| + | Image:The Falcon and the Wolf (24).jpg|Illustration by Ray Lederer '95 | ||
| + | Image:The Falcon and the Wolf (25).jpg|Illustration by Earl Geier | ||
| + | Image:The Falcon and the Wolf (26).jpg|Illustration by Ray Lederer | ||
| + | Image:The Falcon and the Wolf (27).jpg|Illustration by [[Jim Nelson]] | ||
| + | Image:The Falcon and the Wolf (28).jpg|Illustration by Ray Lederer '95 | ||
</gallery> | </gallery> | ||
[[Category:Galleries]] | [[Category:Galleries]] | ||
Latest revision as of 19:03, 25 December 2022
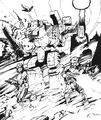
Illustration by ??
Illustration by Bradley K. McDevitt '95
Illustration by Bradley K. McDevitt '95
Illustration by Bradley K. McDevitt '95
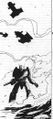
Illustration by Peter Bergting '95
Illustration by Bradley K. McDevitt '94
Illustration by John Paul Lona '95
Illustration by John Paul Lona '95
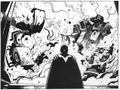
Illustration by Peter Bergting
Illustration by Peter Bergting
Illustration by Peter Bergting
Illustration by Peter Bergting
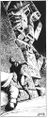
Illustration by Bradley K. McDevitt '95
Illustration by Ray Lederer '95
Illustration by Ray Lederer
Illustration by John Paul Lona '95
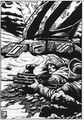
Illustration by Ray Lederer '95
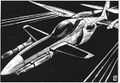
Illustration by Ray Lederer
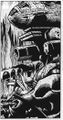
Illustration by Ray Lederer
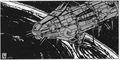
Illustration by Ray Lederer '95
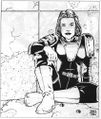
Illustration by John Paul Lona '95

Illustration by Earl Geier
Illustration by Ray Lederer
Illustration by Ray Lederer '95
Illustration by Earl Geier
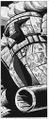
Illustration by Ray Lederer
Illustration by Jim Nelson
Illustration by Ray Lederer '95
.jpg)
.jpg)
.jpg)
.jpg)
.jpg)
.jpg)
.jpg)
.jpg)
.jpg)
.jpg)
.jpg)
.jpg)
.jpg)
.jpg)
.jpg)
.jpg)
.jpg)
.jpg)
.jpg)
.jpg)
.jpg)
.jpg)
.jpg)
.jpg)
.jpg)
.jpg)