Battle of Crossing (3029)
Sarna News
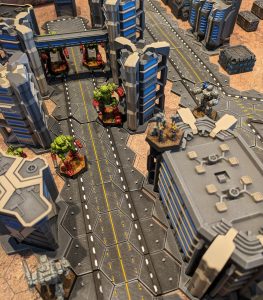
- HEXTECH Review - Wave 3 Brings More Urban Options To Your Battlefield
- Your BattleTech News Round-Up For March, 2024
- Crashing 'Mechs With Jennifer Brozek, Author Of The Rogue Academy Trilogy
- Getting The Word Out With Rem Alternis, Catalyst Community & Marketing Director
- Bad 'Mechs - Yeoman
- Read more →


| Battle of Crossing (3029) | |||||||||||
|---|---|---|---|---|---|---|---|---|---|---|---|
| Part of Fourth Succession War | |||||||||||
|
|||||||||||
| Factions | |||||||||||
| (Attacker) Draconis Combine |
(Defender) Wolf's Dragoons |
||||||||||
| Commanders and leaders | |||||||||||
| Colonel Jaime Wolf[1] | |||||||||||
| Forces involved | |||||||||||
| Fifth Galedon Regulars Eighth Galedon Regulars Twelfth Galedon Regulars Sixteenth Galedon Regulars[1] |
Wolf's Dragoons[1] Tenth Deneb Light Cavalry[2] |
||||||||||
| Environment | |||||||||||
| Canyons, mountains | |||||||||||
The Battle of Crossing was the final engagement of the Fourth Succession War between Wolf's Dragoons and the Draconis Combine's Galedon Regulars. After a month of fierce fighting in Crossing's Tartarus Caldera the Dragoons drove off the remaining DCMS troops but had been reduced to a small fraction of their prewar strength.
Contents
Prelude[edit]
Following their break with the Draconis Combine and the Battle of Misery in 3028, the battered Wolf's Dragoons moved to the Draconis March of the Federated Suns. When they accepted a contract to serve the Suns, Colonel Jaime Wolf specifically requested that his remaining troops be assigned to worlds bordering the Combine. As far as he and the Dragoons were concerned, they were now permanently at war with House Kurita.[3]
The Galedon Regulars, equally enraged at the mauling many of their regiments had suffered from the Dragoons, awaited their chance for vengeance. It arrived soon after with the outbreak of the Fourth Succession War. Determined to honor his contract with the Dragoons' new benefactor, Colonel Wolf deliberately drew down the might of the Galedon Military District upon his understrength units on three border worlds. Protracted and no-holds-barred fighting ensued on Harrow's Sun, Wapakoneta and Glenmora before the Dragoons left these worlds and fell back to Crossing. By September 3029 the surviving mercenaries had gathered in Tartarus Caldera, which housed the remains of a large Star League-era communication dish.[4] [5]
Determined to destroy the Dragoons once and for all, four Galedon regiments assembled at nearby Glenmora to receive replacement BattleMechs and MechWarriors; while the new soldiers were raw academy graduates, they were highly motivated. In addition, an elite DEST unit was attached to this army. By September 2, this combined force was making its way towards Crossing's atmosphere.[6]
The Battle[edit]
Opening Round[edit]
Upon landing on Crossing the Galendon Regulars moved directly for the Tartarus Caldera, and made a ceremonious circuit of the Caldera before each regiment positioned itself at a cardinal point opposite the Caldera's slopes. They waited for the next three weeks before advancing, studying the terrain and working out their final attack plans.[7]
Early on September 28, the DCMS 'Mechs began their advance. Striking from the west the Sixteenth Galedon Regulars, whose specialty lay in urban warfare, struggled to ascend the Caldera slopes, while the Fifth Galedon Regulars, although facing the most difficult terrain on the north side, were also the Combine unit best suited for this kind of warfare and easily made it to the top. Attacking from the east the Twelfth Galedon Regulars likewise reached the summit with few casualties, and the Eighth Galedon Regulars made swift progress up the southern highway despite also taking heavier fire from the defenders.[7]
The Dragoons awaited their attackers until they were at close range and then opened fire, managing with their superior defensive positions to keep them from claiming the summit twice over the next week. On October 9 the Galedon Regulars mounted a third attack, and this time thanks to a warm fog were able to close with the Dragoons before they could be targeted. While three of the Dragoon groups still repelled the attacks, the company holding the north ridge was unable to stop the Fifth Galedon from reaching the summit and tearing a gap in their line.[8]
Upon hearing of this, Colonel Wolf ordered all Dragoons to make a fighting retreat from the Caldera summit. Most Combine troops heeded their orders to simply hold position on the ridge, but two companies of the Fifth Galedon raced down into the Caldera and were only stopped from reaching the Dragoon headquarters by a Dragoon armored company. The Dragoon tankers fought almost to the last soldier until reinforcements arrived.[9]
October 20[edit]
Ten days passed while both sides held their ground. On the morning of October 20 the Dragoons detected a Union-class DropShip descending towards them. To buy some breathing space to deal with these unknown assailants, Colonel Wolf ordered his soldiers to attack the Galedon Regulars up on the slopes; as hoped for, they managed to disrupt the Combine units and give the Dragoons a chance to fend off the incoming foe. Dropping directly into the center of the Dragoons' position, the DEST company, known as the "Sword of the Void", engaged the mercenaries while the Galedon Regulars struck from the outside.[10]
For all of their skill and determination, the Dragoons were on the verge of being overwhelmed from both within and without. At this point the timely intervention of elements from the Tenth Deneb Light Cavalry diverted the Galedon Regulars' attention and allowed the Dragoons to whittle down the DEST company to a single Archer. Then, in the afternoon, salvation for the Dragoons arrived in the form of Zeta Battalion.[2] [5]
Ordered to escort the Dragoons' dependents and wounded to Robinson while their comrades fought elsewhere, Zeta had eventually grown discontented with staying out of the fighting and their commander had finally chosen to rejoin the Dragoons. Using modified civilian vessels, Zeta managed to land unopposed near the Tenth Deneb's staging area outside the Caldera and then struck into the rear of the Sixteenth Galedon before pushing on to place themselves between the Dragoons and the Fifth Galedon.[2]
In short order the Dragoons went over to the offensive. The Fifth and Sixteenth Galedon were driven back against the Caldera's northern wall, while the surviving 'Mechs of the Eighth and Twelfth were easily sniped at by the Tenth Deneb tanks sitting on the Caldera ridge. Meanwhile Colonel Wolf dueled with the DEST Archer pilot who was getting the better of the famed Natasha Kerensky. As they fought within the derelict ruins of the Star League comms dish, the Archer became trapped in the debris and then knocked down by a collapsing pillar. Colonel Wolf managed to extract the Combine 'Mechwarrior's cockpit before the Archer's reactor blew, but the DEST warrior died of her wounds at the Dragoons' field hospital.[2]
Deeming their situation hopeless, the Fifth Galedon's 'Mechwarriors tried to escape by climbing the Caldera walls, only to be easily shot down. Seeing this, the Sixteenth surrendered to Captain Kerensky. The Eighth and Twelfth made their own attempted breakout via the road threading through the southern entrance and were ambushed by Dragoon infantry wielding Inferno missiles, sparking a panicked rout. As surviving DCMS warriors made their escape the battle wound down, ending in victory for the Dragoons.[2]
Aftermath[edit]
Over the next week the remaining DCMS troops gathered at their DropShips, joined by some prisoners freed by the Dragoons. On October 28 they boosted for orbit. Of the four Galedon Regulars regiments, less than three battalions remained between them.[2]
The victory was a costly one for Wolf's Dragoons as well. Of the understrength regiment that had begun the battle, half of its 'Mechs were rendered combat ineffective and thirty 'MechWarriors were KIA, with most of the rest badly wounded. The Dragoons were no longer able to continue fighting in the Fourth Succession War. But they had achieved their strategic objective of keeping the Combine's attention focused upon them instead of exploiting the Federated Suns' weakened border defenses.[2] [5] [1]
Reference[edit]
- ↑ 1.0 1.1 1.2 1.3 Operational Turning Points: Death to Mercenaries, p. 28-29, "Touchpoint: Crossing"
- ↑ 2.0 2.1 2.2 2.3 2.4 2.5 2.6 NAIS The Fourth Succession War Military Atlas Volume 2, p. 33-37
- ↑ NAIS The Fourth Succession War Military Atlas Volume 1, p. 65
- ↑ NAIS The Fourth Succession War Military Atlas Volume 1, p. 66
- ↑ 5.0 5.1 5.2 Operational Turning Points: Death to Mercenaries, p. 8-9
- ↑ NAIS The Fourth Succession War Military Atlas Volume 2, p. 30
- ↑ 7.0 7.1 NAIS The Fourth Succession War Military Atlas Volume 2, p. 30-31
- ↑ NAIS The Fourth Succession War Military Atlas Volume 2, p. 31-32
- ↑ NAIS The Fourth Succession War Military Atlas Volume 2, p. 32
- ↑ NAIS The Fourth Succession War Military Atlas Volume 2, p. 33